
Mini No Bake Pumpkin Cheesecakes: A Delightful Fall Treat
Mini no bake pumpkin cheesecakes are the perfect way to celebrate the flavors of autumn without the hassle of baking. These delightful little desserts combine the creamy richness of cheesecake with the warm, spiced notes of pumpkin, creating a treat that is both indulgent and refreshing. Originating from the classic cheesecake, this no-bake version has gained popularity for its simplicity and ease of preparation, making it a favorite among home bakers and dessert lovers alike.
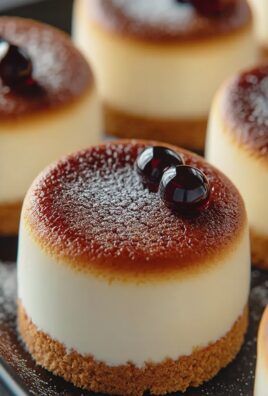
What makes mini no bake pumpkin cheesecakes so beloved is their incredible taste and texture. The smooth, velvety filling pairs beautifully with a crunchy graham cracker crust, offering a delightful contrast in every bite. Plus, they are incredibly convenient to make, allowing you to whip up a batch in no time, perfect for gatherings or cozy nights in. Whether you’re serving them at a holiday party or enjoying them as a sweet treat after dinner, these mini no bake pumpkin cheesecakes are sure to impress and satisfy your cravings.

Ingredients:
- 1 cup graham cracker crumbs
- 1/4 cup granulated sugar
- 1/2 cup unsalted butter, melted
- 1 (8 oz) package cream cheese, softened
- 1 cup pumpkin puree
- 1 cup powdered sugar
- 1 teaspoon vanilla extract
- 1 teaspoon ground cinnamon
- 1/2 teaspoon ground nutmeg
- 1/4 teaspoon ground ginger
- 1/4 teaspoon salt
- 1 cup heavy whipping cream
- Whipped cream, for topping (optional)
- Ground cinnamon, for garnish (optional)
Preparing the Crust
- In a medium mixing bowl, combine the graham cracker crumbs and granulated sugar. Mix well to ensure the sugar is evenly distributed.
- Pour in the melted butter and stir until the mixture resembles wet sand. Make sure all the crumbs are coated with butter.
- Using a tablespoon or your fingers, press the crumb mixture firmly into the bottom of each mini cheesecake cup. You can use a shot glass or the bottom of a measuring cup to help pack it down evenly.
- Once all the crusts are prepared, place the cups in the refrigerator to set while you prepare the filling.
Making the Pumpkin Cheesecake Filling
- In a large mixing bowl, beat the softened cream cheese with an electric mixer on medium speed until smooth and creamy, about 2 minutes.
- Add the pumpkin puree, powdered sugar, vanilla extract, ground cinnamon, ground nutmeg, ground ginger, and salt to the bowl. Mix on low speed until all ingredients are combined, then increase to medium speed and beat until the mixture is smooth and fluffy, about 3-4 minutes.
- In a separate bowl, whip the heavy cream until stiff peaks form. This will take about 3-5 minutes with an electric mixer on high speed.
- Gently fold the whipped cream into the pumpkin mixture using a spatula. Be careful not to deflate the whipped cream; you want to keep the filling light and airy.
Assembling the Mini Cheesecakes
- Remove the crusts from the refrigerator. Using a spoon or a piping bag, fill each cup with the pumpkin cheesecake filling, leaving a little space at the top for the whipped cream if you plan to add it.
- Once all the cups are filled, smooth the tops with a spatula or the back of a spoon for a neat finish.
- Cover each mini cheesecake with plastic wrap and return them to the refrigerator. Allow them to chill for at least 4 hours, or overnight for the best flavor and texture.
Serving the Mini No-Bake Pumpkin Cheesecakes
- When you’re ready to serve, remove the mini cheesecakes from the refrigerator. If you’d like, you can top each one with a dollop of whipped cream.
- Sprinkle a little ground cinnamon on top of the whipped cream for an extra touch of flavor and presentation.
- Carefully remove the cheesecakes from the cups. You can use a small knife to gently loosen the edges if needed.
- Place the mini cheesecakes on a serving platter or individual dessert plates.
- Enjoy your delicious mini no-bake pumpkin cheesecakes with family and friends!
Tips for Success
- Make sure your cream cheese is at room temperature for easier mixing and a smoother filling.
- For a more intense pumpkin flavor, you can add an extra 1/4 cup of pumpkin puree.
- Feel free to experiment with spices; adding a pinch of allspice or cloves can give your cheesecakes a unique twist.
- If you want to make these ahead of time, they can be stored in the refrigerator for up to 3 days before serving.
- For a gluten-free option, use gluten-free graham crackers for the crust.
- 1 cup graham cracker crumbs
- 1/4 cup granulated sugar
- 1/2 cup unsalted butter, melted
- 1 (8 oz) package cream cheese, softened
- 1 cup pumpkin puree
- 1 cup powdered sugar
- 1 teaspoon vanilla extract
- 1 teaspoon ground cinnamon
- 1/2 teaspoon ground nutmeg
- 1/4 teaspoon ground ginger
- 1/4 teaspoon salt
- 1 cup heavy whipping cream
- Whipped cream, for topping (optional)
- Ground cinnamon, for garnish (optional)
- In a medium mixing bowl, combine the graham cracker crumbs and granulated sugar. Mix well to ensure the sugar is evenly distributed.
- Pour in the melted butter and stir until the mixture resembles wet sand. Make sure all the crumbs are coated with butter.
- Using a tablespoon or your fingers, press the crumb mixture firmly into the bottom of each mini cheesecake cup. You can use a shot glass or the bottom of a measuring cup to help pack it down evenly.
- Once all the crusts are prepared, place the cups in the refrigerator to set while you prepare the filling.
- In a large mixing bowl, beat the softened cream cheese with an electric mixer on medium speed until smooth and creamy, about 2 minutes.
- Add the pumpkin puree, powdered sugar, vanilla extract, ground cinnamon, ground nutmeg, ground ginger, and salt to the bowl. Mix on low speed until all ingredients are combined, then increase to medium speed and beat until the mixture is smooth and fluffy, about 3-4 minutes.
- In a separate bowl, whip the heavy cream until stiff peaks form. This will take about 3-5 minutes with an electric mixer on high speed.
- Gently fold the whipped cream into the pumpkin mixture using a spatula. Be careful not to deflate the whipped cream; you want to keep the filling light and airy.
- Remove the crusts from the refrigerator. Using a spoon or a piping bag, fill each cup with the pumpkin cheesecake filling, leaving a little space at the top for the whipped cream if you plan to add it.
- Once all the cups are filled, smooth the tops with a spatula or the back of a spoon for a neat finish.
- Cover each mini cheesecake with plastic wrap and return them to the refrigerator. Allow them to chill for at least 4 hours, or overnight for the best flavor and texture.
- When you’re ready to serve, remove the mini cheesecakes from the refrigerator. If you’d like, you can top each one with a dollop of whipped cream.
- Sprinkle a little ground cinnamon on top of the whipped cream for an extra touch of flavor and presentation.
- Carefully remove the cheesecakes from the cups. You can use a small knife to gently loosen the edges if needed.
- Place the mini cheesecakes on a serving platter or individual dessert plates.
- Enjoy your delicious mini no-bake pumpkin cheesecakes with family and friends!
- Make sure your cream cheese is at room temperature for easier mixing and a smoother filling.
- For a more intense pumpkin flavor, you can add an extra 1/4 cup of pumpkin puree.
- Feel free to experiment with spices; adding a pinch of allspice or cloves can give your cheesecakes a unique twist.
- If you want to make these ahead of time, they can be stored in the refrigerator for up to 3 days before serving.
- For a gluten-free option, use gluten-free graham crackers for the crust.
Conclusion:
If you’re looking for a delightful dessert that captures the essence of fall, then these mini no bake pumpkin cheesecakes are an absolute must-try! Not only are they incredibly easy to whip up, but they also offer a creamy, rich flavor that perfectly balances the warm spices of pumpkin pie. The best part? You don’t even need to turn on your oven! This makes them a fantastic option for those warm autumn days when you want something sweet without the heat.
When it comes to serving suggestions, these mini cheesecakes are incredibly versatile. You can serve them in individual cups for a fun and festive presentation, or you can layer them in a larger dish for a family-style dessert. Top them with a dollop of whipped cream and a sprinkle of cinnamon for that classic pumpkin pie flair. If you want to get a little creative, consider adding a drizzle of caramel sauce or a sprinkle of crushed gingersnap cookies for added texture and flavor. You could even swap out the pumpkin puree for other flavors like chocolate or peanut butter for a unique twist on this recipe.
I encourage you to give these mini no bake pumpkin cheesecakes a try! They are perfect for holiday gatherings, potlucks, or simply as a sweet treat to enjoy at home. The combination of creamy cheesecake and spiced pumpkin is sure to impress your family and friends. Plus, they can be made ahead of time, allowing you to enjoy more time with your loved ones instead of being stuck in the kitchen.
Once you’ve made these delightful desserts, I would love to hear about your experience! Did you stick to the classic recipe, or did you try out some of the variations? Share your thoughts and any creative twists you added in the comments below. Your feedback not only helps me improve but also inspires others to get in the kitchen and try their hand at these delicious mini no bake pumpkin cheesecakes. So grab your ingredients, get mixing, and let’s make some sweet memories together!
Mini No Bake Pumpkin Cheesecakes: Easy Recipe for Fall Desserts
These Mini No-Bake Pumpkin Cheesecakes feature a buttery graham cracker crust and a light, fluffy pumpkin filling, making them a perfect treat for fall gatherings. Easy to prepare and deliciously spiced, these mini desserts are sure to impress your guests!


Leave a Comment