
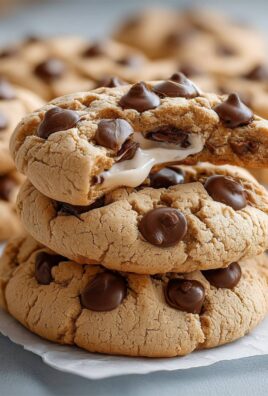
No-Bake Christmas Truffles
No-Bake Christmas Truffles are the perfect festive treat that brings joy and indulgence to any holiday gathering. These delightful bites are not only easy to make but also a wonderful way to celebrate the season with family and friends. Originating from the rich tradition of chocolate confections, truffles have evolved into a beloved holiday staple, often filled with various flavors and textures that tantalize the taste buds.
People adore No-Bake Christmas Truffles for their creamy, melt-in-your-mouth texture and the convenience of not needing an oven. With just a few simple ingredients, you can whip up a batch in no time, making them an ideal choice for last-minute holiday parties or cozy nights in. The combination of chocolate, cream, and festive toppings creates a symphony of flavors that captures the essence of the season. So, let’s dive into this delightful recipe and spread some holiday cheer with these irresistible No-Bake Christmas Truffles!

Ingredients:
- 1 cup of crushed graham crackers
- 1 cup of powdered sugar
- 1/2 cup of unsweetened cocoa powder
- 1/2 cup of unsweetened shredded coconut
- 1/2 cup of creamy peanut butter
- 1/4 cup of honey or maple syrup
- 1 teaspoon of vanilla extract
- 1/2 cup of mini chocolate chips
- 1/2 cup of chopped nuts (optional, such as walnuts or pecans)
- 1 cup of chocolate melting wafers or chocolate chips for coating
- Sprinkles or additional shredded coconut for decoration (optional)
Preparing the Mixture
- In a large mixing bowl, combine the crushed graham crackers, powdered sugar, cocoa powder, and shredded coconut. Use a whisk to mix these dry ingredients thoroughly, ensuring there are no lumps.
- In a separate bowl, mix together the creamy peanut butter, honey (or maple syrup), and vanilla extract. Stir until the mixture is smooth and well combined.
- Pour the wet mixture into the bowl with the dry ingredients. Using a spatula or your hands, mix everything together until fully combined. The mixture should be thick and slightly sticky.
- If you’re adding mini chocolate chips or chopped nuts, fold them into the mixture at this stage. This adds a delightful texture and flavor to your truffles.
Chilling the Mixture
- Once the mixture is well combined, cover the bowl with plastic wrap or a lid. Place it in the refrigerator for about 30 minutes. Chilling the mixture makes it easier to roll into balls.
Forming the Truffles
- After the mixture has chilled, remove it from the refrigerator. Using your hands, scoop out about a tablespoon of the mixture and roll it into a ball. Aim for a size similar to a golf ball.
- Place the rolled truffles on a baking sheet lined with parchment paper. Make sure to leave some space between each truffle, as they may slightly expand.
- Continue rolling the rest of the mixture into balls until it is all used up. You should have around 20-25 truffles, depending on the size you make them.
Coating the Truffles
- In a microwave-safe bowl, melt the chocolate melting wafers or chocolate chips. Heat in 30-second intervals, stirring in between, until the chocolate is completely melted and smooth.
- Once the chocolate is melted, take each truffle and dip it into the chocolate, using a fork to ensure it is fully coated. Allow any excess chocolate to drip off before placing it back on the parchment-lined baking sheet.
- If you want to add sprinkles or additional shredded coconut for decoration, sprinkle them on top of the chocolate-coated truffles while the chocolate is still wet.
Chilling the Coated Truffles
- After all the truffles are coated, place the baking sheet back in the refrigerator for about 30 minutes, or until the chocolate coating is set.
Serving and Storing
- Once the chocolate has hardened, your no-bake Christmas truffles are ready to be served! You can arrange them on a festive plate or in a decorative box for gifting.
- Store any leftover truffles in an airtight container in the refrigerator. They will keep well for up to two weeks, although I doubt they’ll last that long!
Variations and Tips
- If you want to switch up the flavors, consider using almond butter instead of peanut butter for a different taste.
- For a festive touch, you can add a few drops of peppermint extract to the mixture for peppermint truffles.
- Feel free to experiment with different coatings, such as crushed nuts, cocoa powder, or even colored sugar for a holiday look.
- To make these truffles vegan, substitute honey with maple syrup and ensure the chocolate used is dairy-free.
- 1 cup of crushed graham crackers
- 1 cup of powdered sugar
- 1/2 cup of unsweetened cocoa powder
- 1/2 cup of unsweetened shredded coconut
- 1/2 cup of creamy peanut butter
- 1/4 cup of honey or maple syrup
- 1 teaspoon of vanilla extract
- 1/2 cup of mini chocolate chips
- 1/2 cup of chopped nuts (optional, such as walnuts or pecans)
- 1 cup of chocolate melting wafers or chocolate chips for coating
- Sprinkles or additional shredded coconut for decoration (optional)
- In a large mixing bowl, combine the crushed graham crackers, powdered sugar, cocoa powder, and shredded coconut. Use a whisk to mix these dry ingredients thoroughly, ensuring there are no lumps.
- In a separate bowl, mix together the creamy peanut butter, honey (or maple syrup), and vanilla extract. Stir until the mixture is smooth and well combined.
- Pour the wet mixture into the bowl with the dry ingredients. Using a spatula or your hands, mix everything together until fully combined. The mixture should be thick and slightly sticky.
- If you’re adding mini chocolate chips or chopped nuts, fold them into the mixture at this stage.
- Cover the bowl with plastic wrap or a lid and place it in the refrigerator for about 30 minutes.
- After chilling, scoop out about a tablespoon of the mixture and roll it into a ball.
- Place the rolled truffles on a baking sheet lined with parchment paper, leaving space between each.
- Continue rolling until all the mixture is used, yielding about 20-25 truffles.
- In a microwave-safe bowl, melt the chocolate melting wafers or chocolate chips in 30-second intervals, stirring until smooth.
- Dip each truffle into the melted chocolate, using a fork to coat fully. Allow excess chocolate to drip off before placing it back on the baking sheet.
- If desired, sprinkle with decorations while the chocolate is still wet.
- Place the baking sheet back in the refrigerator for about 30 minutes, or until the chocolate coating is set.
- Once hardened, serve the truffles on a festive plate or in a decorative box for gifting.
- Store leftovers in an airtight container in the refrigerator for up to two weeks.
- For a different flavor, substitute almond butter for peanut butter.
- Add a few drops of peppermint extract for a festive twist.
- Experiment with various coatings like crushed nuts or colored sugar.
- To make vegan, use maple syrup instead of honey and ensure the chocolate is dairy-free.
Conclusion:
If you’re looking for a delightful treat that captures the essence of the holiday season, these No-Bake Christmas Truffles are an absolute must-try! Not only are they incredibly easy to make, but they also offer a rich, indulgent flavor that will impress your family and friends. The combination of chocolate, cream cheese, and festive toppings creates a perfect balance of sweetness and texture, making each bite a little piece of heaven. Plus, the fact that they require no baking means you can whip them up in no time, leaving you with more moments to enjoy the festivities.
When it comes to serving suggestions, these truffles are incredibly versatile. You can present them on a beautiful platter dusted with powdered sugar or cocoa powder for a classic look. Alternatively, consider placing them in festive cupcake liners for a fun and colorful presentation. They also make for a wonderful gift! Package them in a decorative box or jar, and you have a thoughtful homemade present that anyone would appreciate. If you want to get creative, try rolling some of the truffles in crushed nuts, sprinkles, or even coconut flakes for added texture and flavor. You can also experiment with different flavorings, such as peppermint extract or orange zest, to give your truffles a unique twist that reflects your personal taste.
I encourage you to gather your ingredients and give these No-Bake Christmas Truffles a try. They are perfect for holiday parties, family gatherings, or simply as a sweet treat to enjoy while cozying up by the fire. Once you make them, I would love to hear about your experience! Did you stick to the classic recipe, or did you add your own special touch? Share your thoughts and any variations you tried in the comments below. Your feedback not only helps me but also inspires others in our community to get creative in the kitchen.
So, roll up your sleeves, get your hands a little messy, and dive into the joy of making these delightful truffles. Trust me, once you taste them, you’ll understand why they are a holiday favorite. Happy cooking, and may your holiday season be filled with sweetness and joy!
No-Bake Christmas Truffles: Easy and Delicious Holiday Treats
These No-Bake Christmas Truffles are a festive treat combining creamy peanut butter, cocoa, and coconut, all coated in chocolate. Easy to make and customizable with your favorite toppings, they are perfect for holiday gatherings and make a delightful gift!

Leave a Comment